V A N I L L A B E A N B U T T E R C A K E
OK M A R C H and A P R I L are beyond crazy months for me... Let me repeat this, beyond crazy for me!
1.) It's Taylor's birthday March 24th... 12 Years old!
2.) St. Patrick's Day... Go green or go home!
3.) My Mom's birthday
4.) My sister in laws birthday
5.) It's Easter
6.) It's Ryan's birthday April 3rd... 10 Years Old!
A N D
7.)It's spring break in April... Last Spring Break both kids have together!
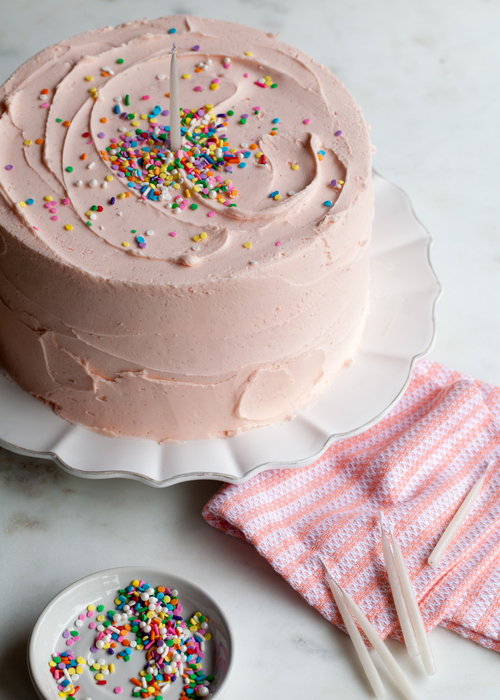
So yup, that's why I'm always truly broke those 2 months... Just keeping it real {wink}! Yes, I am that mom that throws a party and tries my hardest to make "each" kid feel so special! But, this year I asked {begged} if they could somehow have their parties together because on Ryan's 10th Birthday we will be boarding a plane to H A W A I I. They said, YES! So in honor of my kids birthdays I'm going to bake this Vanilla Bean Butter Cake... Or at least attempt to. Doesn't it look amazing! Please let me know if anyone has ever made this cake! Good, Bad... Tell all! I'm drooling over this bakers fabulous pictures {link to her site} Everything she makes looks so good! Cross your fingers and wish me luck!
- 1-1/2 cups all-purpose flour
- 1-1/2 cups cake flour
- 1 tablespoon Fleischmann's® Baking Powder
- 3/4 teaspoon salt
- 1/2 teaspoon baking soda
- 1/2 cup sour cream
- 1 cup whole milk
- 1 cup unsalted butter, softened
- 2 cups sugar
- Seeds of 1 vanilla bean
- OR 2 teaspoons Pure Vanilla Extract
- 1 teaspoon Pure Vanilla Extract
- 2 eggs
- 3 egg yolks
Preheat oven to 350°F. Grease and flour two 9-inch round cake pans; set aside.
Combine dry ingredients together; set aside. Combine sour cream and milk; set aside.
Beat butter on medium-low speed of electric mixer until creamy, about 2 minutes. Add sugar and vanilla bean seeds; mix on medium speed until the mixture is fluffy and pale in colour, about 2 to 4 minutes. Scrape sides of bowl.
Add eggs and eggs yolks, one at a time, beating on low speed until blended. Add vanilla extract; beat on low speed until blended.
Add in half of the fflour mixture. Once this is incorporated, pour in the milk mixture while the mixer is running on low speed. Once the milk is absorbed, add in the remaining fflour mixture. After the last streaks of flour are incorporated, mix the batter on medium-low speed for about 20 seconds until smooth.
Pour batter into prepared cake pans. Bake for 35 to 40 minutes or until wooden pick inserted in centre comes out clean.
Cool cakes on a wire rack for about 15 minutes or until pans are cool enough to handle; remove cakes from pans. Continue to cool on wire rack until cakes are at room temperature.
Wrap each layer in a double layer of plastic wrap; chill in refrigerator for at least 2 hours or up to 2 days before cutting and frosting. (Chilling makes the cakes easy to cut.)
When ready to frost, cut each layer horizontally in half; frost with Whipped Vanilla Buttercream Icing.
Whipped Vanilla Buttercream Icing
- 2-1/4 cups unsalted butter, softened
- 6 to 6-1/2 cups powdered sugar
- Seeds of 1 Vanilla Bean
- OR 2 teaspoons Pure Vanilla Extract
- 2 teaspoons Pure Vanilla Extract
- 1/4 cup to 1/3 cup milk
Beat butter at medium-low speed of electric mixer until smooth and creamy (1 to 2 minutes.)
Gradually add 6 cups powdered sugar, vanilla bean seeds,and vanilla extract with mixer at low speed, scraping bowl occasionally. Mix until blended.
Beat at medium-high speed 3 to 5 minutes, until buttercream is light and airy and nearly white. If needed, add the additional powered sugar or milk until desired consistency.
1)Once the cakes are completely cool, cut them in half (horizontally) with a long serrated knife to create four layers of cake.
2)Place the bottom layer of cake on a cake stand or serving dish. Spread on about 1 cup of the buttercream with an off-set spatula or the back of a spoon.
3)Top the buttercream with the next layer of cake and repeat.
4)Crumb coat the cake with a thin layer of buttercream and chill until set (about 15 to 20 minutes).
5)Tint the remaining buttercream (if desired) and frost the outside of the cake with a large off-set spatula.


